Thursday, February 20, 2014

Up Cycling Clementine Crate

Winter brings clementines. These yummy treats come in a cute wood container. I had a contest with the kids that who ever ate the most clementines could have the box and pick the color it was painted. Of course the girl won, she loves fruit. The boy? Not so much.

This will show you how one simple idea will keep me up all night because I always have to take everything to the next level.

Paint

I painted the box pink with some acrylic paints (from the craft store) that I keep in the basement. The clementine crate needs 2 coats of

paint to cover up the design that is already on the box.  I was going to do 2 different color pinks, one on the inside and one on the out then leave it as is, HOWEVER, I didn't like the fact that there were holes and gaps in the bottom. I decided to get out the Modgepodge  and some craft paper and give decoupaging a try. I bought the Modgepoge for a different project and had a little left over.

I can't resist the scrap book isle at the local craft stores. If something is on sale, I buy it for later. Who knows when you need pretty paper at 9:32 at night? The most difficult part of this entire project was finding the place where I saved that paper. If you can't find your pretty paper, wrapping paper will do nicely, or you can always print something from your computer.

Measure

One thing I've learned from wood working is measure twice and cut once.  If you want to create stuff, you have to become master of the ruler. To master something you need to practice, practice, practice!! 

My ruler experience has shown me that I always measure short.  To compensate, I always cut a little long and re-measure, I can always re-cut a little to get it perfect. I thought it was just me, but apparently its a thing for left handers. IT IS!! DON'T LAUGH AT ME!

Cut

I don't bother using scissors for straight cuts any more ever since, I received a portable rotary trimmer two Christmases ago.  I am a menace with scissors. I can never find good left-handed scissors so I force myself to go right. 

When you are in elementary school and the only left handed scissors that are provided to you are mangled and dull, you learn to use the rightie scissors but never to the mastery and finesse that a rightie can handle them.  

Glue

I poured Elmers on the bottom and spread it around with a paint brush.

Fix

There were some very large gaps in the bottom of that Clementine crate, so I cut and added thick cardboard and glue to re-enforce the parts that had no backing. I don't know if this is necessary,  but I can picture my kid driving a pencil right through it so I am better safe than sorry.

Add Detail.

This is the type of thing that keeps me up all night. I didn't like the fact that the ugly staples that held together the box showed so I decided to cover them. Cutting these all these little papers and gluing them over each staple wasn't the most efficient idea. Did I mention, I hate scissors? 

I ran out of flowers so I could not cover all the staples, If I had planned this project a little better I could have made sure I had enough paper to finish the job. I still had some staples showing.

Decoupage. 

Decoupage is the easiest thing going. You MUST give it a try.  No matter how you slop this goop on, it still looks good. The only thing you have to worry about is little hairs coming out of your brush and sticking on your project, that is why it is better to do it with a paint sponge.

The more coats the better.

Since it was 11:00 by this time, I had to get this deal finished so I stopped at 3 coats. You should let it dry completely before you add the next coat, but I don't, and it still looks good. Also the more coats you add, the better it looks.

Uses

This makes a great little tray to keep your tools in, an open shadow box, keep it on a book shelf for small toys, or stack them and make them into its own book shelf. The best idea came from my daughter, the doll bed.


Grade: B 

Skill Level: Low

Difficulty Level: Easy

Frustration Level: Low

Price: 


 My second attempt at doing this turned out great using the little paper birds I created. You can click right here to get paper bird instructions and printables too! Make sure you check out all the different Paper Crafts so that you can decorate your clementine creates.


Sunday, February 9, 2014

Minecraft Creeper Valentines Day Card - My Heart Explodes for You

Are your kids obsessed with Minecraft? Mine too. This year I made a printable Minecraft Valentines Day Creeper Card that either can be printed out with white paper on a color printer or green paper on a black and white printer. My daughter helped me cut these out. Where is my son? Playing Minecraft. 

See the printable below!


Print Me

Print Me on Back

Saturday, February 8, 2014

Valentines Day Kids Spa

Sometimes I am tempted to just pick up candy hearts and give them to my kid's for Valentines Day but I want them to learn that gift giving is not what you can buy in a store, its what you give of yourself. Also, when you give of yourself you are also getting something in return.

Every year I give my kids a spa day on Valentines day. They absolutely love it and so do I. A spa is really easy to recreate because it is basically an event for your 5 senses. 
Taste: spa water drinks and teas.
Sound: soothing tunes.
Smell: soothing scents.
Touch: warm back, arm and hand rubs
Sight: decorated environment. I do this by lighting the room with mini lights. Kids are easy to please.

First I hand them their spa menu for the evening as soon as they walk into the door from school. However, this all starts after homework is completed. Who ever gets the homework done first, gets to be the first spa customer. 

1) There is nothing like a hot Mr. Bubble, bubble bath with soothing tunes playing from the radio and a cool refreshing cucumber/mint water to start off your relaxing spa day. 

2)Spa's always have cucumber water available because its easy to make, slice up some cucumbers, put them in a  pitcher with ice, mint leaves (or fresh lavender and lemon) and water and VIOLA a refreshing drink!  


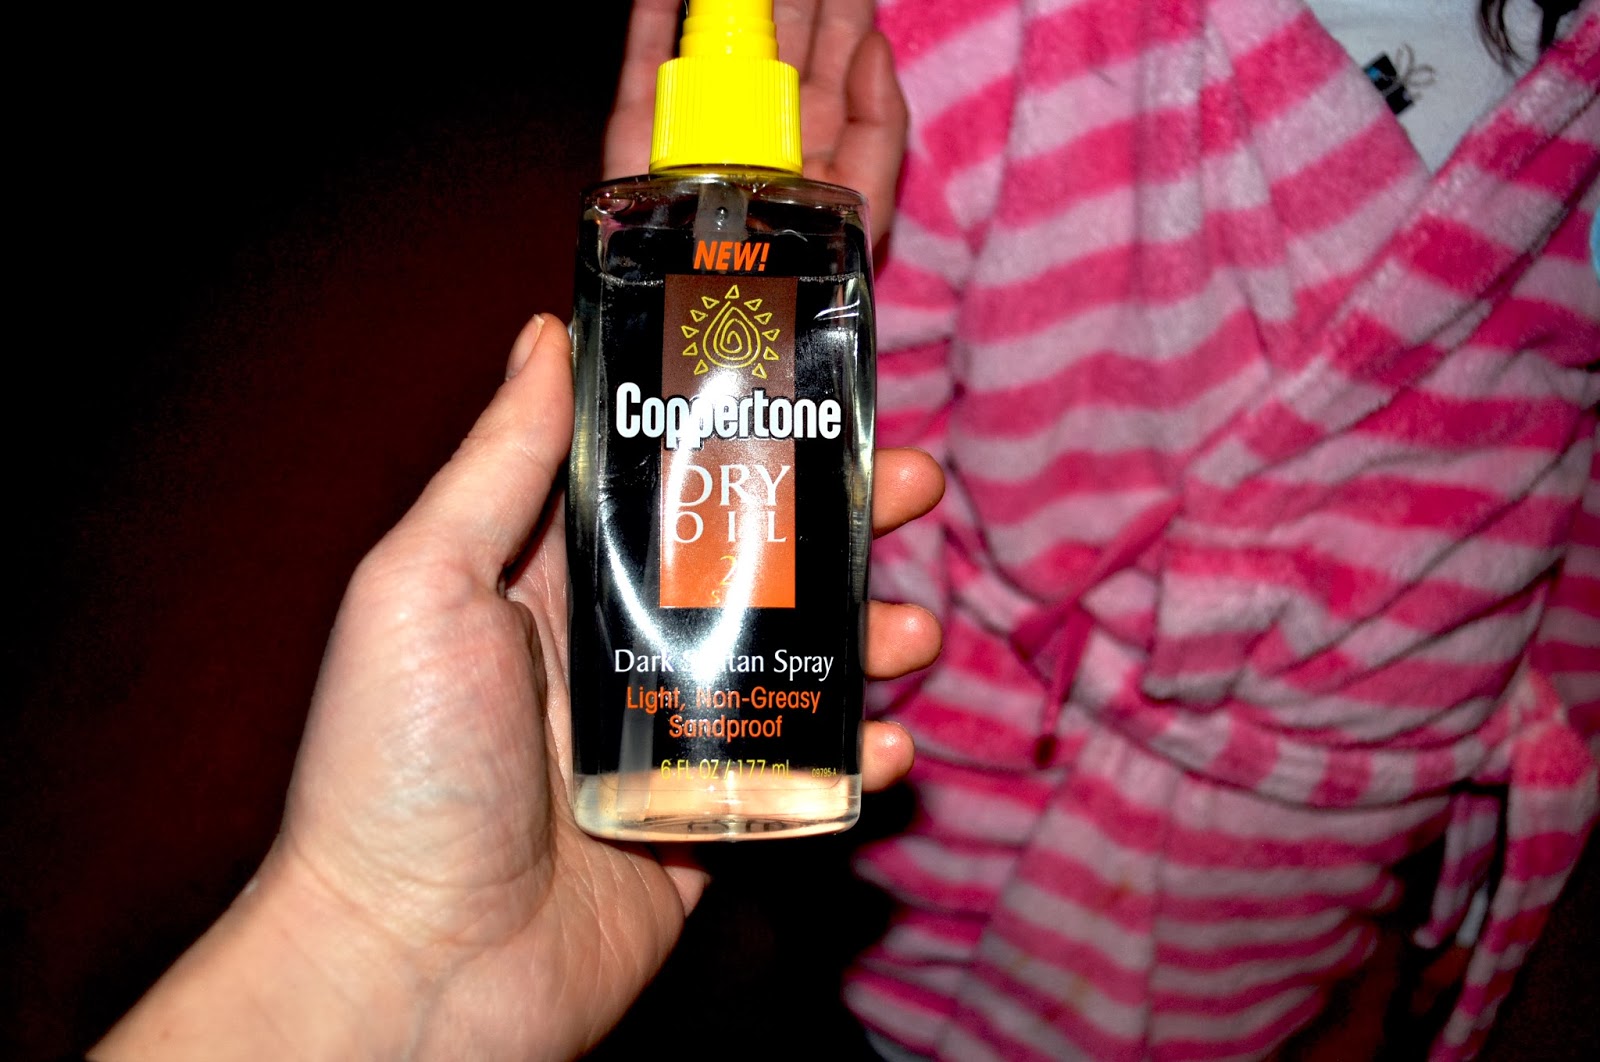
3) Coconut suntan oil always remind me of the beach, its safe to use on skin and it is a great olfactory experience for relaxation. Though I'd never use an SPF 4 for sun protection! That's Crazy!

4) I have rose hips in a jar, so I boil water and make a rosehip tea, let it cool until it is warm and put it in a spray bottle. It is really nice after a refreshing massage. Different smells is what really gives this the true spa experience. After a day, you are going to have to toss out the rose water and wash out the mister bottle because it gets bacteria if it sits out and goes bad. I found this out the hard way.


5) After the massage I load the kids up with hot towels. I have this towel warmer that my friend gave me one Christmas (I'm not sure how I ever survived the winter without it), but you can just put the towels in the dryer to get the same effect.

6) Hot teas are also a spa favorite. My kids love mint. Celestial Seasonings has a nice selection of herbal teas that your kids may really enjoy.

7) Paraffin wax warmer I received at my wedding shower 10+ years ago. Since the kids turned 2, I think I have used it on them more than myself.

8) My kid's favorite dinner is swordfish and broccoli. Strange and expensive, I know, but at least it is healthy.

9) Nothing says I love you like Carvell icecream cake.

10)Whats more fun than snuggling with your parents and watching tv in their big king size bed decorated with pink heart lights?

11)...Unless you are reading your favorite book and getting kisses.

Saturday, February 1, 2014

Paper Birds

 I'm finding paper crafts to be addicting and even my kids can participate.  I've created a printable so that you can make the same birds!
I printed the above printable on brown card stock and cut the birds out given at the bottom of this page. I created 3 different style birds using different mediums. 

1) The blue birds were colored with a little rub of a blue oil pastel and I gave some birds a little red Faber Castell Gelato on their bellies. The beak was colored with an orange Faber Castell Gelato and the bird was sprayed with Bahama Blue Fireworks to give it that nice shiny Bahama blue color.

2) The red/white birds were colored with red Faber Castello Gelato on the belly and wings with orange on the beak and a spritz of Perfect Pearls Mists that created a "dazzling pearlescent shimmer" according to the bottle. HA! I love this stuff!! Its as good as its product description. 

3)I decided to leave some birds plain brown without a shine using striped scrapbook paper as the wings.

The wings of the birds were glued on with Elmer's glue. I always outline everything with Sharpie Marker, this time I used the color brown. The eyes were made with 
white and black Tulip Slick Paint. Remember to put the white on first and allow it to dry before putting on a dab of black. All of the materials can be found online or at your local craft store.

Give it a try and tell me how yours came out!!! 

Grade: A
Skill Level: Moderate
Difficulty Level: Moderate
Frustration Level: Low

Cost: $0 (I used the materials from the snowman project)
Print Me

Sunday, January 26, 2014

Mock Stained Glass using Crayon Shavings


We started out with broken paperless crayons and tried to shave them manually in a sharper. It was taking to long for my impatient kids, so my daughter though she would help the process out by using the electric sharpener. What a mess that was, I had pencil shavings mixed in my crayon shavings and my sharpener got suck on the soft crayons. My next idea was to put the crayons in a plastic bag and pound it gently with a rubber mallet, only I couldn't find it, so I got out the hammer and a pile of rags so the kids wouldn't break my counter top. I only had to scream 'BE GENTLE' a few times, they were pretty good about it.  

I set out all the crayon bits on paper plates and put a piece of wax paper in front of each kid and told them to decorate the paper with the shavings. Why do kids always have to wipe their gritty hands full of crushed crayon on their clothes. I mean REALLY? This is when I realized this should have been an outside project. There were bits of crayon on my kitchen floor, my counter, their clothes, my clothes. UGH!!! What a mess!! 

Before ironing you have to make a crayon wax paper sandwich with 2 pieces of rag. In other words, have your project layered this way rag wax paper crayon bits wax paper rag


I set my iron on cotton and ironed the top of the rag. Good thing I had the rags on there because the crayon squirted out the side of the wax paper even thought the crayon was an inch from the edge.

I am not impressed by this process. It was a huge mess and the product turned out to resemble a muddy looking Rorschach Test. I didn't like the bubbles that got stuck in with the crayon and it didn't look like stained glass at all. I would not recommend this craft at all because of the high mess to outcome ratio.

GRADE: F

Skill Level: Easy 
Difficulty Level: Low to Moderate (for kids)
Frustration Level: High (for mom)

Cost:  <$ (almost free)

Friday, January 17, 2014

Paper Owls

I never really understood scrap-booking. I only made scrapbooks for my kids because I never filled out all the info in the baby book. Instead of looking like a careless mom, I decided to take apart the books and put it into scrapbook form so I could cut out all the blank pages to hide my inability to track their first year of life. Looking through all the different sticker and notions in the scrapbook isle of the craft store makes me overwhelmed. I don't know how anyone could look through all that stuff, it puts me into sensory overload. 

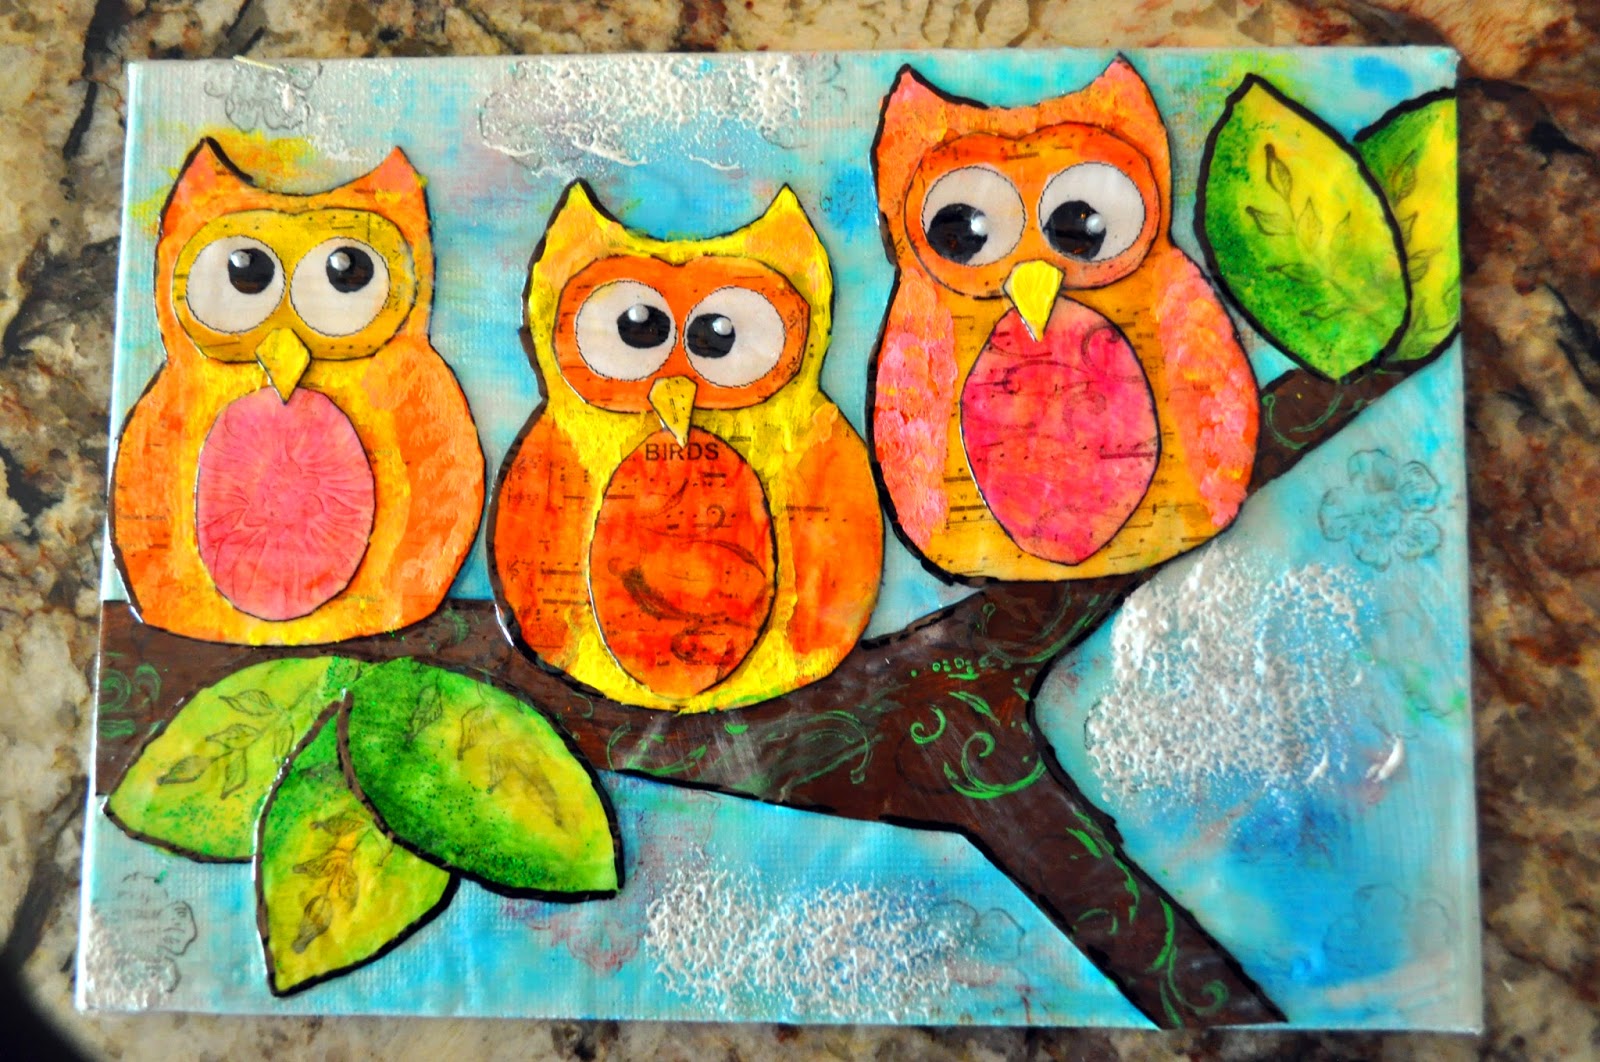
So I never understood paper crafts, until the other day when I went to go make snowmen. They turned out so great, I wanted to give owls a try and I was hooked. Now I'm paper craft crazy! I like the mixed media art on music and what a perfect way to make three little owls is using sheet music to "Three Little Birds" by Bob Marley.  I attached a printout for you to try too.  

Materials
Cream Card Stock 
Sharpie Marker
Faber Castell Gelatos
Acrylic Paints
Tulip Beads in a Bottle
Modgpodge
Aleene's Clear Gel Tacky Glue 

1) You can print out the printable card stock. The thicker paper is better for gluing and painting, it doesn't curl up as easy. 

2)  I love the Gelatos because they glide like butter and you can blend it with your thumbs on the paper or you can wet a paint brush to get a water color effect, or you can rub them on a stamp for a completely different look. I really don't know how I lived without these little pigment chap-sticks.

3) Use stamps to embellish. I used a snow flake stamp to make the irises, it makes a great texture. 

4) Paint eye whites with white acrylic paint. 

5) Outline with a sharpie. Also use sharpie to color in pupil of eye.

6)Glue together.

7)Feather on acrylic paints to give a feathery look


8)Use "Beads in a Bottle" to give a sparkle to the eye

5)Decoupage it all together. 

I did one set of small owls and a set of large ones. How cute! 

Grade: A
Skill Level: Moderate-High
Difficulty Level: Moderate
Frustration Level: Low
Cost: $0 I used the materials from the snowman project


Saturday, January 4, 2014

DIY Picture Frame

The only thing better than Mixed Media Art Snowmen is mixed media art snowmen in a picture frame. When I was wandering through Joann Fabrics, I stumbled across this bag of 3 dollar scrap wood bag and decided to give frame making a try. 

1) I measured four strips around the picture frame to create one square that fit tightly around the canvas.

2) Cut each strip with a scissors since balsa wood is so easy to cut.

3) Glued the strips together to make a square. This was a bit frustrating because the wood kept sliding so that the edges of the frame were not exactly 90 degrees. A parallelogram with crazy angles does not really make a great picture frame. It took a little time to get it perfectly square. 

4) I cut another 4 pieces of wood to create another square that was slightly smaller than the first. This is so the frame doesn't slide out the front.

5) Then I glued the smaller square on top of the first square and layered the pieces so that the frame would not have a weak point where all the wood met at the same place. 

6) Painted it with FLAT black paint. The flat paint hides a lot of flaws.

7) After the paint dried I taped the picture inside the picture frame with masking tape.

8) I hot glued on cheap strap hangers that I took off some other picture frames. I always get a little thrill when I actually can recycle materials from a previous project.

9) I fished wired gold ribbon through the strap hangers. I use wired because it is much easier to tie a bow that looks stiff and perfect. 

Since these pictures and frames are small and light weight, I was able to hang them directly from the ribbon.

Grade: B+

Skill Level: Low
Difficulty Level: Moderate (its difficult to cut the wood to the correct size, its a good thing the bag comes with plenty of wood strips)
Frustration Level: Moderate (working with glue and wood sliding all over the place is always frustrating)