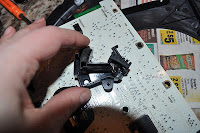
I simply did this diagnostic test in the video, and it was very easy. The fix looked very easy too!!! It took like 3 seconds in the video!!! So for 15 dollars, I went on Amazon and purchased the Roomba error code 9 fix kit. I was more than excited to get going on this project when it arrived in the mail. The paper instructions told me to go to http://www.roombaparts4less.com/ for the fix instructions. I don't like to read over all the instructions first, that can be intimidating. I take it step by step and start with the first step... then two hours later I looked up and saw this on my kitchen counter.
 |
| And she couldn't put Humpty back together again. |
 |
| Finally getting to the bumper!!! |
 |
| Here is the chip that needs to be fixed |
I needed to look up Soldering instructions because I've only ever seen my mom do it on stained glass when I was a kid. The only thing I can tell you about it is that its HOT and kids get burned. After explaining this to my son several times, I convinced him not to touch anything near the area I was working.
Guess what? I did it!! I replaced what I needed to replace!!!Now I had to but Alice back together. No instructions. Yikes!!!
I have to say, thank the great skies for You Tube and some guy who decided to video tape himself repairing a Roomba. I bet he made this video for the arm chair engineer like myself. My son loved watching this video with me. He made me watch it several times.
Poor Alice, 4 missing screws and the same Error 9 code beep. Looks like the scrap heap for you. Goodbye dear friend.


Too bad, but excellent story.
ReplyDeleteRyan, I'm coming over to your house. I need someone with a linix box to help me re-program her, if she can't clean floors, maybe she can deliver beer.
ReplyDeleteHere's a couple other sites with instructions. I got mine working using variations of these
ReplyDeletehttp://www.schneordesign.com/Avi/irobot/roomba_mod2.htm
http://www.eesolutions.ca
http://www.roombaexperts.com
Hopefully this is a mute point and you already have your Roomba working. Cheers.