Friday, January 17, 2014

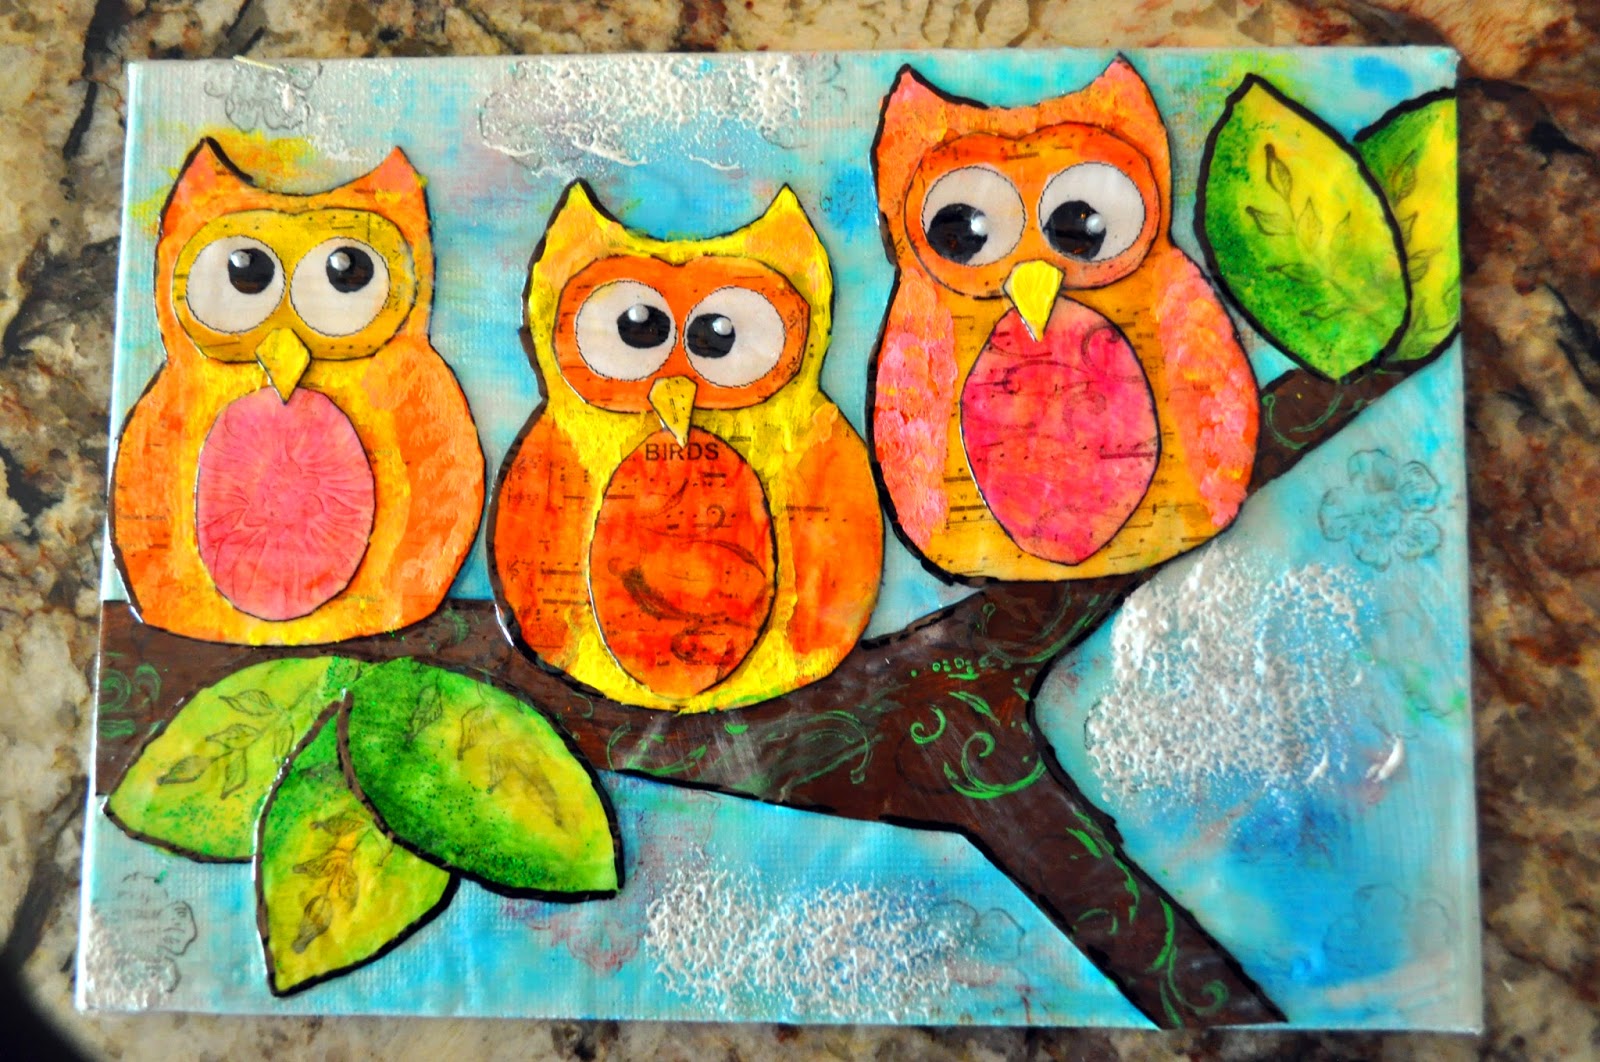
Paper Owls

I never really understood scrap-booking. I only made scrapbooks for my kids because I never filled out all the info in the baby book. Instead of looking like a careless mom, I decided to take apart the books and put it into scrapbook form so I could cut out all the blank pages to hide my inability to track their first year of life. Looking through all the different sticker and notions in the scrapbook isle of the craft store makes me overwhelmed. I don't know how anyone could look through all that stuff, it puts me into sensory overload. 

So I never understood paper crafts, until the other day when I went to go make snowmen. They turned out so great, I wanted to give owls a try and I was hooked. Now I'm paper craft crazy! I like the mixed media art on music and what a perfect way to make three little owls is using sheet music to "Three Little Birds" by Bob Marley.  I attached a printout for you to try too.  

Materials
Cream Card Stock 
Sharpie Marker
Faber Castell Gelatos
Acrylic Paints
Tulip Beads in a Bottle
Modgpodge
Aleene's Clear Gel Tacky Glue 

1) You can print out the printable card stock. The thicker paper is better for gluing and painting, it doesn't curl up as easy. 

2)  I love the Gelatos because they glide like butter and you can blend it with your thumbs on the paper or you can wet a paint brush to get a water color effect, or you can rub them on a stamp for a completely different look. I really don't know how I lived without these little pigment chap-sticks.

3) Use stamps to embellish. I used a snow flake stamp to make the irises, it makes a great texture. 

4) Paint eye whites with white acrylic paint. 

5) Outline with a sharpie. Also use sharpie to color in pupil of eye.

6)Glue together.

7)Feather on acrylic paints to give a feathery look


8)Use "Beads in a Bottle" to give a sparkle to the eye

5)Decoupage it all together. 

I did one set of small owls and a set of large ones. How cute! 

Grade: A
Skill Level: Moderate-High
Difficulty Level: Moderate
Frustration Level: Low
Cost: $0 I used the materials from the snowman project


Saturday, January 4, 2014

DIY Picture Frame

The only thing better than Mixed Media Art Snowmen is mixed media art snowmen in a picture frame. When I was wandering through Joann Fabrics, I stumbled across this bag of 3 dollar scrap wood bag and decided to give frame making a try. 

1) I measured four strips around the picture frame to create one square that fit tightly around the canvas.

2) Cut each strip with a scissors since balsa wood is so easy to cut.

3) Glued the strips together to make a square. This was a bit frustrating because the wood kept sliding so that the edges of the frame were not exactly 90 degrees. A parallelogram with crazy angles does not really make a great picture frame. It took a little time to get it perfectly square. 

4) I cut another 4 pieces of wood to create another square that was slightly smaller than the first. This is so the frame doesn't slide out the front.

5) Then I glued the smaller square on top of the first square and layered the pieces so that the frame would not have a weak point where all the wood met at the same place. 

6) Painted it with FLAT black paint. The flat paint hides a lot of flaws.

7) After the paint dried I taped the picture inside the picture frame with masking tape.

8) I hot glued on cheap strap hangers that I took off some other picture frames. I always get a little thrill when I actually can recycle materials from a previous project.

9) I fished wired gold ribbon through the strap hangers. I use wired because it is much easier to tie a bow that looks stiff and perfect. 

Since these pictures and frames are small and light weight, I was able to hang them directly from the ribbon.

Grade: B+

Skill Level: Low
Difficulty Level: Moderate (its difficult to cut the wood to the correct size, its a good thing the bag comes with plenty of wood strips)
Frustration Level: Moderate (working with glue and wood sliding all over the place is always frustrating)


Saturday, December 28, 2013

Cone Christmas Trees

The watering can is in the tub to hold the vine under water
I was going to buy one of those floral cones so that I could make a cone Christmas tree...YIKES, those  things are expensive!!! So I decided to attempt to use grapevine to make a Christmas tree.  I have tons of it out back. I made a wreath last year out of it and it was super easy. 
 I soaked he grapevine in the tub overnight. The next day rapped them in tight coils, tied them with twine to hold the shape and let it dry for another night. That stuff is a mess. It leaves wood droppings everywhere and the wood sometimes snaps when you are trying to wrap tight coils.

The next day, I cut the twine holding the coil and it basically held its shape. When I stacked the coils on top of each other, I could CLEARLY see that this wasn't gonna work. It looked like a stack of coiled branches. I needed something to hold it up like a stick, so I looked outside and saw some bamboo stakes in the ground that held up my tomatoes in the summer. I ran outside and ripped that sucker out of the ground (boy was that frozen in there). The stick wouldn't stand up by itself so I decided I needed a base.

Lucky I do so many projects that I have stuff left over from something I did years ago. I had cement and class tiles, so I mixed the cement, poured it on a paper plate and put on the glass tiles for a decorative effect. 

After I hot glued my stick onto my base, and tried to figure out how to hot glue the grapevine to the base. I realized, unfortunately, this STILL wasn't gonna work. I needed more grapevine, and honestly, I've already spent 2 days on this project, and there was no guarantee that it would look right anyway, so I put this in the "Abandoned" craft pile at my house.

At least my elf now has a stripper pole.


Grade: F
Skill Level: High
Difficulty Level: Moderate
Frustration Level: 
High (took too long to make)
Cost: $

I will give this a second attempt at some time in the future.


Monday, December 23, 2013

Mixed Media Art Nativity

My very Catholic friend wanted a huge nativity for her front lawn and I told her if I had a jigsaw and some more time that I could do it for her. Alas, it is the day before Christmas Eve and I've run out of time. Maybe next year. 

Since I've been into mixed media and paper art, I've decided to make her a nativity on a tiny canvas that she can hang in her home.  I searched through the internet for some ideas for inspiration.

I have a printable here for you to use. You can cut out Mary, Joesph and Jesus on card stock and use it as a template to trace around. Originally I was going to put the family over the heart using different scrap booking papers, but I loved what the song looked like so much, I decided to just trace the family in the heart. You can do whatever you like.

Materials:  
    Small Canvas
    Cream Card Stock 
    Tsukineko Fireworks Spray Blue set of 3
    Faber-Castello Color Gelatos
    Perfect Pearls Mists
    Glitter Glue
    Paper Glue
    Yellow and White Slick Pen for fabric
    Black Sharpie Pen

1) Print out the below picture on card stock and cut out the pieces to use as a tracing template on your chosen scrap book paper, or trace it directly in the heart over the song "Away in the Manger." 


PRINT ME
2) Spray the canvas with the fireworks and let it dry.

3)Use the gelatos to color in my pieces of Jesus, Mary and Joesph. For the clothing, I used the darker colored gelato out the outside and lighter inside. I LOVE LOVE LOVE the look of gelato's when they are blended with fingers and thumbs. I cut used the plain paper for the faces, but you can use any paper you like. Cut out a star with the remaining paper.

4) (optional) Spray the pieces of Mary Jesus and Joesph with the Perfect Pearls Mists and let that dry.

5) On the blue canvas, sponge in a large white heart and try to blend it into the blue for a nice highlighting.

6) Glue everything together on the canvas once it is all dry.

7) Use the glitter glue, stamps and slick pens to add detail.

8) Outline with sharpie.

10) Decoupage.


I'm not much of an artist, but I can draw simple shapes, unfortunately, every time I draw baby Jesus he looks suspiciously like Kenny from South Park. What do you think?


Grade: A
Skill Level: Easy
Difficulty Level: Easy
Frustration Level: Low
Cost: 0 (already had the materials from last project for the Snowman)


Friday, December 20, 2013

Christmas Card 2013

Every year I get the urge to do a creative and fun Christmas card. Only, it requires me to be behind the camera, yell at everyone and increase my blood pressure (see Last year's card). This year I wanted to be in the photo and give my hypertension a break, so I decided to give myself an early Christmas gift and hire a true professional. It was nice having someone "instruct" my kids while I just stood there kissing my husband. It seems they listen to other people much better than they do to me. It was a much more pleasant experience than previous years, thanks to True Story Photography.


Grade: A+
Skill Level: None
Difficulty Level: None
Frustration Level: None
Cost: $$$

Tuesday, December 10, 2013

Button, and Old Jewelry Ornaments.

Look what you can make with a hot glue gun, a gold wire, a bag of buttons and some broken jewelry. These ornaments look great on my tree!


Friday, December 6, 2013

Christmas Star

I like a challenge. When the music teacher from my child's school asked me if I could make a 3 foot star light enough to hang from the ceiling of the auditorium without tearing it down the ceiling, I was more than ecstatic to do it. The weird thing is that my kid wasn't even in the Christmas Pageant. Yes, I'm a sucker. 

While running all the possibilities through my head, I decided to call my mom because she always has the best ideas that are easy to execute. She told me

1) Get cardboard boxes then draw out 2 large stars with 4 points and 2 small stars with 4 points.

2) Cut the stars out and cut in half 1 large star and the 2 small stars at the tallest point.

3) Paint them gold.

4) Hot glue the large star pieces that are in half to the other large star that was not cut in half. Then in the corners where the large stars cross, glue in the smaller star halves.

 I think that glue guns were made for cardboard because it worked perfectly.

The edges didn't look really fantastic so I decided to 

5) hot glue gold tinsel garland from the dollar store on the edges of my cardboard star.

6) then i punched 2 holes in the top of the star with a screwdriver and fished through picture frame wire for easy hanging.

This was surprisingly SUPER easy.


Here she is!!!


Grade: A
Skill Level: Easy
Difficulty Level: Easy
Frustration Level: Low

Cost: Low
