Sunday, February 15, 2015

Bacon Roses


Finding gifts for your husband is difficult. While you would be happy with flowers or a cute resin statue for your garden, but him, not so much. This is a great Valentines Day gift idea for your meat eating man who has everything. 

Materials:

  • 1 Package of Bacon
  • Tin foil
  • Fresh Spinach leafs
  • Toothpicks
  • Bamboo skewers

First you want to roll the bacon into a rose shape. About half way through rolling your rose, you may want to fold the bacon in half and continue wrapping around the center so that your rose is thin at the bottom and chunky in the middle.

Wrap the tinfoil tightly around the bottom of the rose and use additional foil to mold a flat bottom so the rose can stand up in the oven.  If you shove a toothpick through the bacon rose, that helps keep the rose in its place. It is important to keep the bacon standing up while baking, or else they are just laying in their grease and lose their shape.

Bake in the oven 350 for 20 minutes. If you like your bacon crispy, you may want to test out your roses to make sure they are the desired crispness before taking them all out of the oven. 

Once the bacon rose has cooled, push 2 spinach leaves through the bamboo skewer then put the bacon rose on top. 

I paired the bacon roses with a dark chocolate fondue dip. Ever have chocolate covered bacon? Its da bomb.

Grade: A
Skill Level: Low 
Difficulty Level: Low
Frustration Level: 
Low
Cost: $$

Sunday, February 1, 2015

Mixed Media Art Dresses

 Yikes, I've been so busy with a back up of creations that I don't have time to blog the directions. It is more complex with mixed media art because the process is creative and haphazard. I grab a bunch of papers, paints and doodads then just start gluing and decoupaging. After an hour I've created an absolute mess I look up and think "Oh No, I forgot to take pictures. The very first time I did canvas mixed media art I was very careful to write the directions (see here). However now, i'm an unorganized mess, so if I skip a few steps here, please forgive me.

My friend opened up her new store in the summer and I wanted to bring her something that she could hang up that was personal. She loves bling, accessories and the Disney Princesses so I decided to make her 3 mixed media canvas creations.

Materials
Acrylic paint
Piece of bubble wrap
Canvases
Scrap book paper
Butter fly stamps
Wire
Aleene's craft glue
Rhinestones
Modgepodge
Fuzzy things, tulle or any fabric you found around the house
Modpodge

First I painted the canvases a base of 3 colors, red, burgundy and black, using the bubble wrap to blend the colors together.

I drew up some paper tracers on card stock as a template so I could make dresses hats and purses out of the scrap book paper. I wish I could share the template with you, but I forgot to scan them in DOH!

Once Upon a time is my most favorite craft paper (hint hint if anyone is looking for a gift for my up coming birthday). I used this paper for part of the back ground because it blended in nicely with the background I painted. I ran the scrap book paper through the printer and printed out: 

"A pair of shoes can change your life, Just ask Cinderella"

"It don't mean a thing if it ain't got that bling"

"Where friends come first, style is a bonus" (this happens to be her store saying)

I used the gold wire that I had in my beading kit to create mini coat hangers for the dresses and added rhinestones, tulle or fuzzy to them to give the looks you see here. 

After the glue on the canvas dried, and I stamped the background with butterflies and white ink then used Modpodge all over the background. When the modpodge finally dried, I glued on the dresses. 

You can see them in person at Girlfriends On Main


Monday, January 5, 2015

Bird House to Fairy House


I gave my mom a terrarium this year for her Christmas gift and decided to make her a fairy house to put in it. I already had this 4 inch tall birdhouse that my son had previously painted and decided to re-purpose it for this project. (It already served its purpose by occupying my son for 20 minutes)


Materials

  •  Bird house
  • Hot glue gun
  • Scissors
  • Balsa wood
  • Pine cones
  • Grout
  • Acrylic Paint
  • Q-tips
  • Paper towels.
I started off by cutting the perch off the birdhouse with the scissors. I also used the scissors to cut the balsa wood into window and door frames. It just looks better when a door is set into a frame instead of laying on top because that is the way your home actually looks. I hot glued stones around the door frame to look as though it was part of the house. Then hot glued the window frames on the house so that the windows would look set in to the stone. I used a hot glue gun to affix flat shiny stone that I ordered off  the internet. 

I didn't want to use white grout on the house so I mixed a little brown acrylic paint so the contrast of the grout wouldn't be so pronounced. I also used that same brown acrylic paint to paint the window and door frame. 

Sometimes working with grout can be a real pain, but this project is small enough that it isn't so bad. You apply the grout by smoothing it on to get in between the stones, you wait a few minutes, then wipe it off. 

Later, after the grout has completely dried, like to I go back and clean it up a little more by rubbing wet and dry Q-tips on the rocks to make them shine. 

The messiest part  of the project was the pine cones. What a mess. Cutting the pieces off the pine cone was like ripping out teeth and I was getting sap all over my hands, which I just happen to be allergic to. My hands were bright red and I itched for days. The problem was, my pine cone was too fresh, and if I had given them a little time to dry out, the pieces of the pine cone would have fallen right off. 

Whats nice about the pine cone is that it looks just like shingles and you don't need to grout in between, like you would stone. So after you get that sucker piece off, you hot glue it on the house and there is no more steps.

I almost forgot, I just hot glued a small bead for the door nob!

I'm not sure if this house could sustain the elements outside but it sure will look cute in a tiny indoor terrarium. 

Grade: A
Skill Level: Low (This is a good project to practice grouting. Fairy houses look better messy than perfect.)
Difficulty Level: Low(If you use dried pine cones.)
Frustration Level: 
Low(Again, if you use dried pine cones.)
Cost: $-$$ (I had all this material at home so it actually cost me nothing.)

Sunday, December 28, 2014

Clothes Pin Nativity : Wise Men and Animals


I think my favorite part of my Clothespin Nativity was the 3 Wise Men.  Just made of clothespins and ribbon, then glued together with Aleene's glue and finished with sharpie marker, they turned out to be a stylish group of men.

The easiest thing about this was the fact that I used my old wired ribbon because it made it easier to affix the material in the way that looked like flowing robes. 


The donkey and the sheep body was created the same with 3 clothespins each glued together, the legs were cut off the clothes pin in the center to separate the front and back legs.

The donkey's head was just a clothespin hot glued on a just little tilted to give him an inquisitive look. The sheep's head was just a tiny piece of the bottom of the clothes pin glued in a midst a bunch of cotton balls. These animals are so fun, they just crack me up every time I look at them.

Tuesday, December 23, 2014

Clothes Pin Nativity

I make my friend's Christmas gifts every year, I usually make everyone a similar item, but my one very Catholic friend always requests a Nativity  every year. I think she is trying to slowly convert me to Catholicism one craft project at a time. This year I decided to step up my game and do a clothes pin nativity. 


JMJ Clothes pins

  • My materials included 
  • Clothes pins (the ones that look like people), 
  • Twine, 
  • Burlap (I had some with gold flecks that I saved from a wedding shower gift. I save everything,)
  • White and tan felt,
  • River birch sticks from outside,
  • Some garden sheers to cut up the sticks and fabric sheers for the fabric.
  • Aleene's Clear Gel Tacky Glue and hot glue
  • Sharpie Marker
I started out by rolling the burlap around the clothes pins and fixing it with tacky glue. If you like having burnt fingertips then by all means use the hot glue because it works faster, but I'd rather be patient and still have feeling in my fingers. 

I cut the felt into rectangular pieces and glued them around the heads and folded and glued it to the bodies, to give the appearance in the picture. Mary's felt rectangle was the length of the clothes pin and Joesph's was 1/3 the length of the clothes pin. I tied the twine around the top of Joesph's head to give the appearance of a keffiyehs. (Now there is your word of the day. Go Google it now.)
Jesus was just a cut piece of the bottom of a clothes pin with the burlap glued to his head, then another piece to swaddle him in. Swaddle him just like you did your own babies, only tinier. 

I started out making Jesus's  manger bed by cutting some thicker birch pieces the same length, hot gluing them into 2 X shapes then taking one piece to hot glue across the bottom V part of the X to hold it all together. The thinner birch pieces were cut and glued length wise as shown in the picture. I misplaced my tacky glue so I just got out the Elmer's and glued on the sticks.

Use the sharpie to pencil in the eyes. I just go with simple shapes. If you screw up the eyes, the entire thing looks creepy. 

Stay tuned for the blog update for the sheep, donkey, barn, and wise men.

Grade: A
Skill Level: Moderate
Difficulty Level: Moderate
Frustration Level: Moderate
Cost: $ (Cost of Felt, burlap and clothes pins)

Tuesday, December 16, 2014

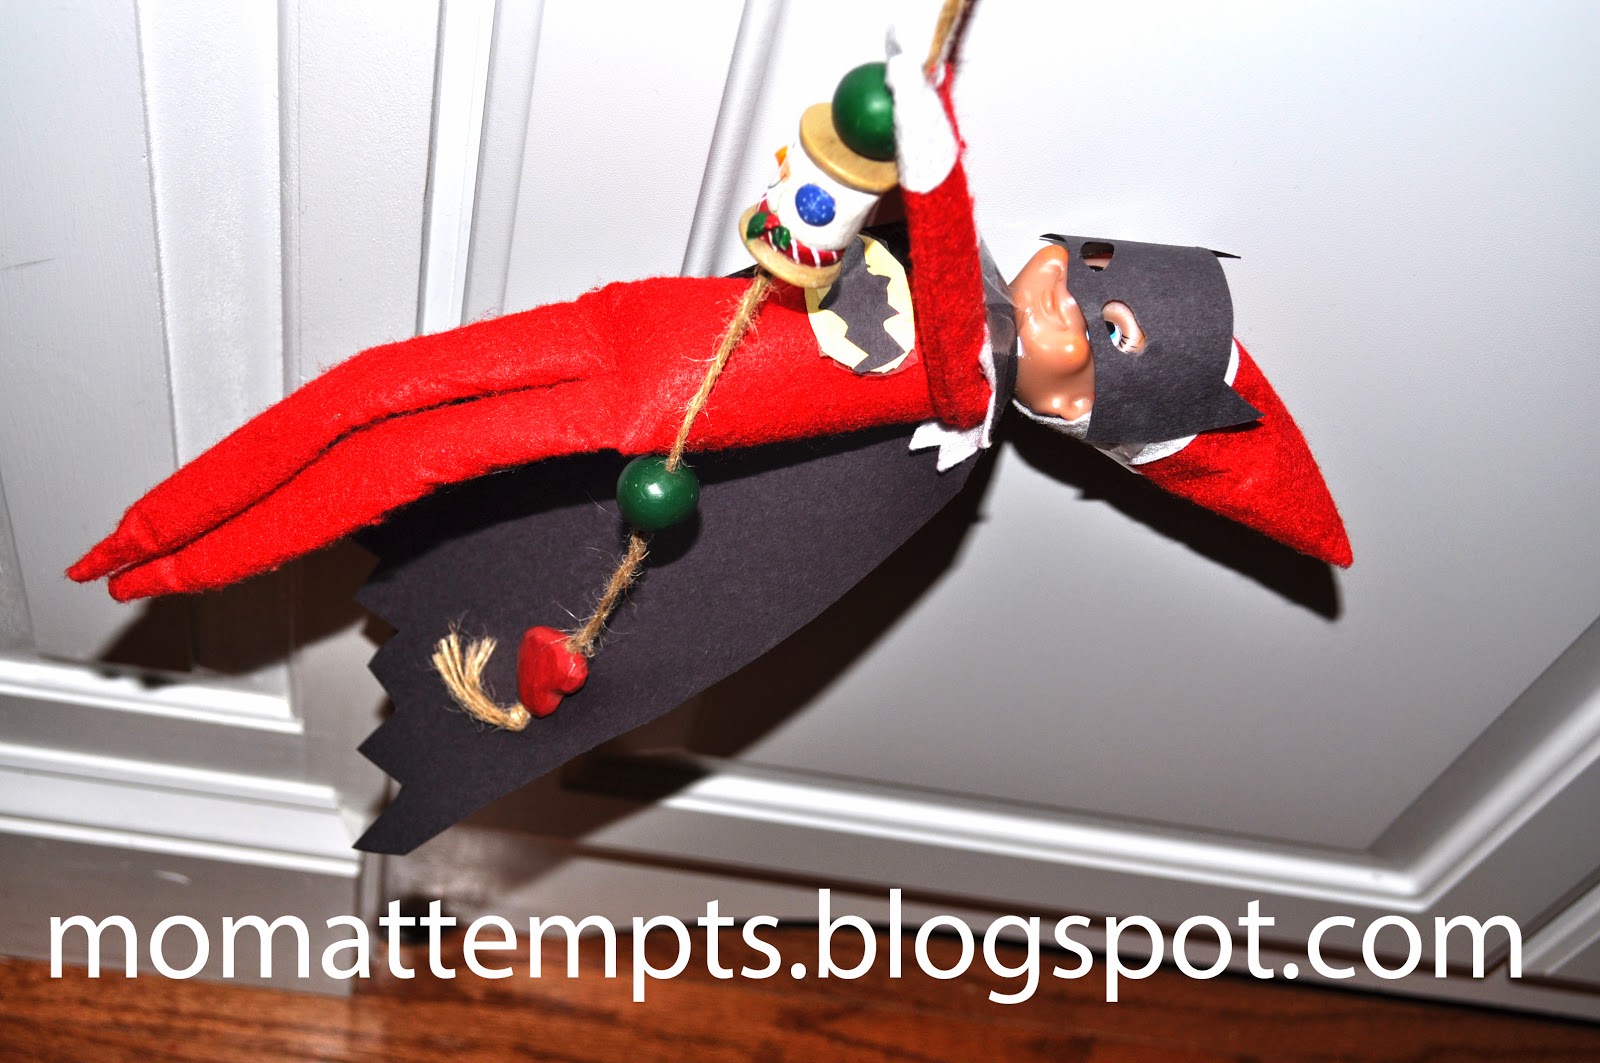
Batman Costume for Elf on Shelf - With Free Printable


On my local Facebook yardsale group, there was a woman selling felt batman costumes for elves at $8 each... and that convinced me people are crazy and will spend money on anything. I decided to give the same costume a try using black and yellow construction paper and tape. This basically free elf costume was totally worth the effort, especially since it amused my kids for an entire day. You can easily make them as well, just print the template below on construction paper, cut that out, tape it to the elf  and viola... Batman. I just saved you $8, you're welcome. 
Grade: A
Skill Level: low
Difficulty Level: low
Frustration Level:low

Cost: basically nothing


Free Printable


Sunday, December 14, 2014

Paper Fairies Mixed Media Art

It was love at first sight when I found Julie Nutting Prima Doll Stamps. I see them all over Pinterest and I found one doll stamp that reminded me of a fairy then away my imagination went.


Materials,
  Prima Doll Stamps
  Butterfly Stamps
  Clear Acrylic Block (for stamping)
  Acrylic Paints
  Black and Gold Ink Pads
  Black Sharpie Fine Point Pen
  Tiny Scissors
  Inkadinkado Mindscapes Clear Stamps (Butterfly)
    Colored scrapbook Paper
  Cardstock

You can buy these cling stamps on Amazon, you need an acrylic block to stick them on so you get an even looking ink stamp. I could not find an acrylic block large enough to hold the doll stamp, but I did find this Fiskers cutting thing at Jo-ann fabrics. I wish I could tell you what it was, but it was the first clear thing I could find that was large enough to stick the cling stamp on.

Its pretty simple to make these paper dolls, but the cutting is tedious. You ink the stamp and press it on several different papers, cut them all out and glue the smaller cut-outs on the larger cut outs. The largest cutout should be on heavy card stock so that the paper glued on top of it will not force it to curl up. There are craft scissors that are used specifically for this, but I used curved and straight cuticle scissors. I find them easier to use, but they give me blisters. 

I used acrylic paint for the skin and the hair. I loaded up my brush with 3 different pink (or green or blue) acrylic paint and swiped the curls to give the hair fun highlights.  Its always good to go over everything with a black sharpie marker, it just makes it pop.

For the wings, I just found this beautiful, intricate stamp by Inkadinkado. After I cut it out, I thought that maybe the wings looked too much like angel wings and not enough like fairy wings. I asked for an expert opinion (my mother) and she told me I should cut them more deeply to resemble insect wings. You can see the difference in the picture. I also cut the wings directly down the middle so that i can position each wing on the back of the fairy where they needed to go. 

One of my favorite parts of mixed media crafts is adding embellishments.  I use nail art stickers from the dollar store because they are small and cheap. 

I will finish blogging about the mushrooms and the canvas in another blog entry as soon as I can get to it!!

Happiness is playing with paper dolls!


Grade: A
Skill Level: Moderate
Difficulty Level: Moderate
Frustration Level:High (I find cutting anything is frustrating)

Cost: $$