Sunday, December 28, 2014

Clothes Pin Nativity : Wise Men and Animals


I think my favorite part of my Clothespin Nativity was the 3 Wise Men.  Just made of clothespins and ribbon, then glued together with Aleene's glue and finished with sharpie marker, they turned out to be a stylish group of men.

The easiest thing about this was the fact that I used my old wired ribbon because it made it easier to affix the material in the way that looked like flowing robes. 


The donkey and the sheep body was created the same with 3 clothespins each glued together, the legs were cut off the clothes pin in the center to separate the front and back legs.

The donkey's head was just a clothespin hot glued on a just little tilted to give him an inquisitive look. The sheep's head was just a tiny piece of the bottom of the clothes pin glued in a midst a bunch of cotton balls. These animals are so fun, they just crack me up every time I look at them.

Tuesday, December 23, 2014

Clothes Pin Nativity

I make my friend's Christmas gifts every year, I usually make everyone a similar item, but my one very Catholic friend always requests a Nativity  every year. I think she is trying to slowly convert me to Catholicism one craft project at a time. This year I decided to step up my game and do a clothes pin nativity. 


JMJ Clothes pins

  • My materials included 
  • Clothes pins (the ones that look like people), 
  • Twine, 
  • Burlap (I had some with gold flecks that I saved from a wedding shower gift. I save everything,)
  • White and tan felt,
  • River birch sticks from outside,
  • Some garden sheers to cut up the sticks and fabric sheers for the fabric.
  • Aleene's Clear Gel Tacky Glue and hot glue
  • Sharpie Marker
I started out by rolling the burlap around the clothes pins and fixing it with tacky glue. If you like having burnt fingertips then by all means use the hot glue because it works faster, but I'd rather be patient and still have feeling in my fingers. 

I cut the felt into rectangular pieces and glued them around the heads and folded and glued it to the bodies, to give the appearance in the picture. Mary's felt rectangle was the length of the clothes pin and Joesph's was 1/3 the length of the clothes pin. I tied the twine around the top of Joesph's head to give the appearance of a keffiyehs. (Now there is your word of the day. Go Google it now.)
Jesus was just a cut piece of the bottom of a clothes pin with the burlap glued to his head, then another piece to swaddle him in. Swaddle him just like you did your own babies, only tinier. 

I started out making Jesus's  manger bed by cutting some thicker birch pieces the same length, hot gluing them into 2 X shapes then taking one piece to hot glue across the bottom V part of the X to hold it all together. The thinner birch pieces were cut and glued length wise as shown in the picture. I misplaced my tacky glue so I just got out the Elmer's and glued on the sticks.

Use the sharpie to pencil in the eyes. I just go with simple shapes. If you screw up the eyes, the entire thing looks creepy. 

Stay tuned for the blog update for the sheep, donkey, barn, and wise men.

Grade: A
Skill Level: Moderate
Difficulty Level: Moderate
Frustration Level: Moderate
Cost: $ (Cost of Felt, burlap and clothes pins)

Tuesday, December 16, 2014

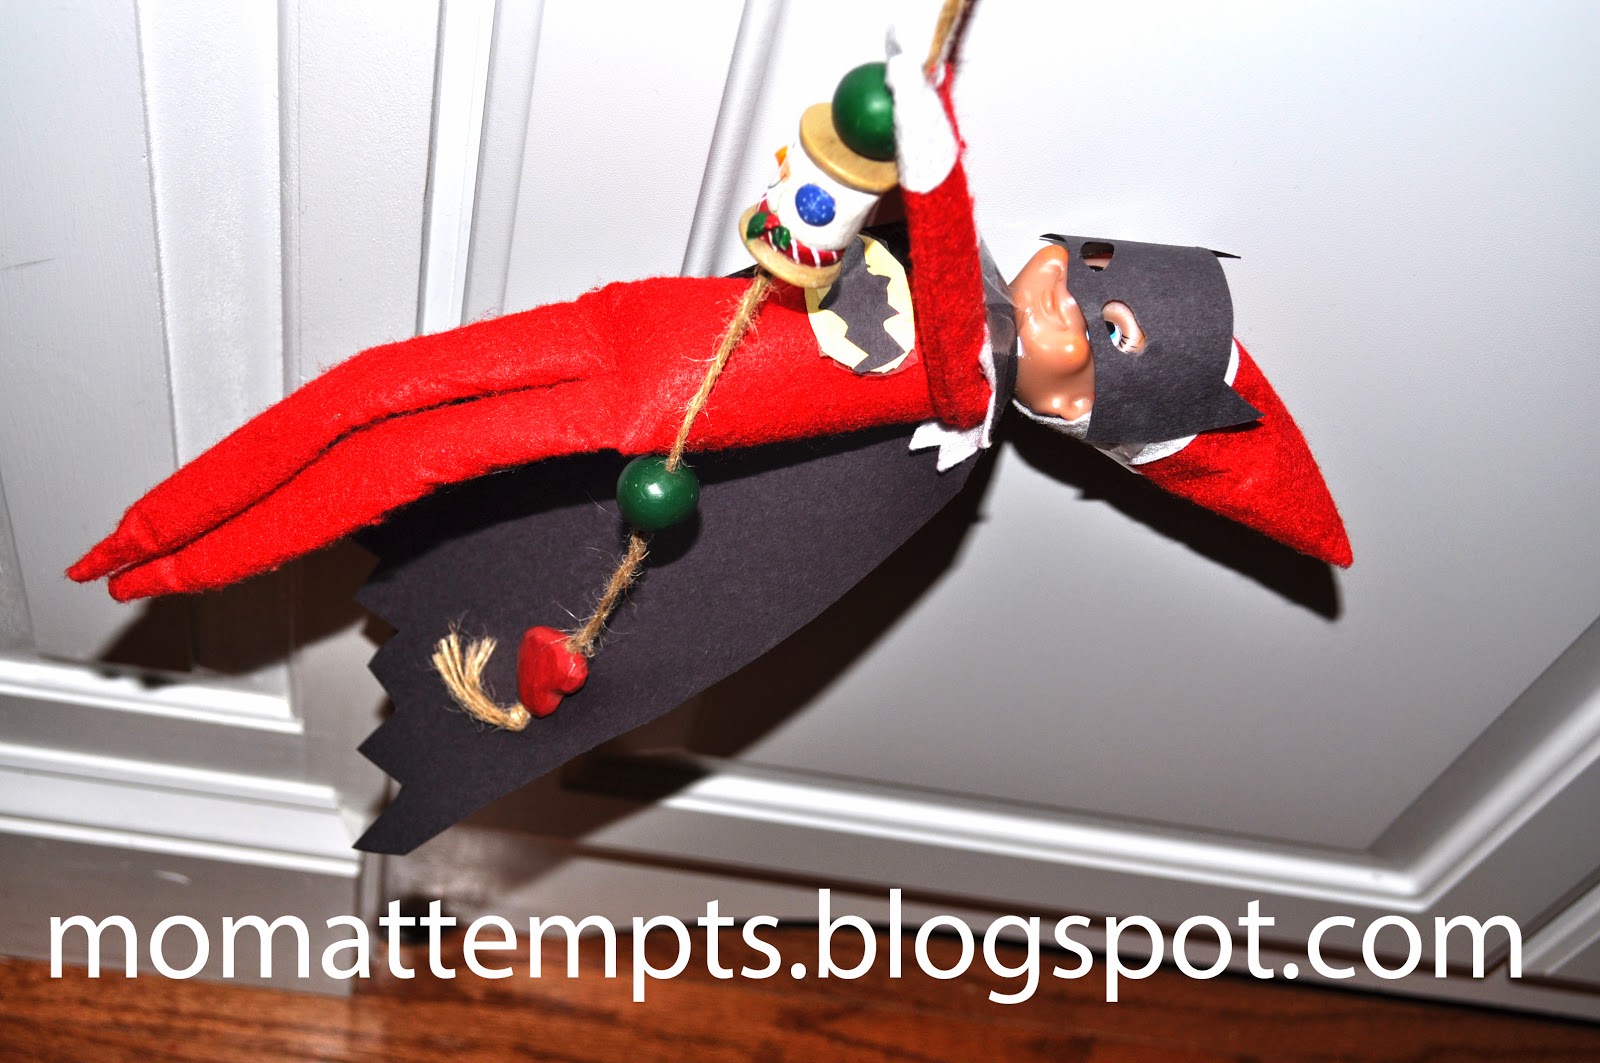
Batman Costume for Elf on Shelf - With Free Printable


On my local Facebook yardsale group, there was a woman selling felt batman costumes for elves at $8 each... and that convinced me people are crazy and will spend money on anything. I decided to give the same costume a try using black and yellow construction paper and tape. This basically free elf costume was totally worth the effort, especially since it amused my kids for an entire day. You can easily make them as well, just print the template below on construction paper, cut that out, tape it to the elf  and viola... Batman. I just saved you $8, you're welcome. 
Grade: A
Skill Level: low
Difficulty Level: low
Frustration Level:low

Cost: basically nothing


Free Printable


Sunday, December 14, 2014

Paper Fairies Mixed Media Art

It was love at first sight when I found Julie Nutting Prima Doll Stamps. I see them all over Pinterest and I found one doll stamp that reminded me of a fairy then away my imagination went.


Materials,
  Prima Doll Stamps
  Butterfly Stamps
  Clear Acrylic Block (for stamping)
  Acrylic Paints
  Black and Gold Ink Pads
  Black Sharpie Fine Point Pen
  Tiny Scissors
  Inkadinkado Mindscapes Clear Stamps (Butterfly)
    Colored scrapbook Paper
  Cardstock

You can buy these cling stamps on Amazon, you need an acrylic block to stick them on so you get an even looking ink stamp. I could not find an acrylic block large enough to hold the doll stamp, but I did find this Fiskers cutting thing at Jo-ann fabrics. I wish I could tell you what it was, but it was the first clear thing I could find that was large enough to stick the cling stamp on.

Its pretty simple to make these paper dolls, but the cutting is tedious. You ink the stamp and press it on several different papers, cut them all out and glue the smaller cut-outs on the larger cut outs. The largest cutout should be on heavy card stock so that the paper glued on top of it will not force it to curl up. There are craft scissors that are used specifically for this, but I used curved and straight cuticle scissors. I find them easier to use, but they give me blisters. 

I used acrylic paint for the skin and the hair. I loaded up my brush with 3 different pink (or green or blue) acrylic paint and swiped the curls to give the hair fun highlights.  Its always good to go over everything with a black sharpie marker, it just makes it pop.

For the wings, I just found this beautiful, intricate stamp by Inkadinkado. After I cut it out, I thought that maybe the wings looked too much like angel wings and not enough like fairy wings. I asked for an expert opinion (my mother) and she told me I should cut them more deeply to resemble insect wings. You can see the difference in the picture. I also cut the wings directly down the middle so that i can position each wing on the back of the fairy where they needed to go. 

One of my favorite parts of mixed media crafts is adding embellishments.  I use nail art stickers from the dollar store because they are small and cheap. 

I will finish blogging about the mushrooms and the canvas in another blog entry as soon as I can get to it!!

Happiness is playing with paper dolls!


Grade: A
Skill Level: Moderate
Difficulty Level: Moderate
Frustration Level:High (I find cutting anything is frustrating)

Cost: $$

Saturday, November 29, 2014

Karate Elf on the Shelf - No Sew Costume

I am stepping up my elf game this year with felt costumes, because obviously, I'm crazy. Also, there is nothing I like better than starting a project at 10 O'Clock at night (sarcasm). But I HAVE to because it is imperative that I am positive, that everyone is in bed, eyes closed and knocked out. I should probably do a 'Mom Attempts: putting her kids to bed'... but we all know I'd fail miserably.  

My son just tested for his orange belt and my daughter will soon be testing for her brown belt, so I'm sure they'd get a kick out of their elves practicing Kenpo Karate.  I am so surprised that it was only 4 easy steps.

Materials
   White felt 
   Any desired colored felt
   GOOD FABRIC scissors
   Bamboo skewers
   Old fruit or vegetables (its weird, but trust me)

Karate Elves
1) Cut a strip of colored felt with your GOOD FABRIC scissors. Not with your dull kitchen scissors that is used to cut paper, the dog's hair and chicken cutlets... I'm talking your quality pair of fabric scissors that is hidden from your husband and children so they don't ruin them. If you use any old scissors on felt, you will be cursing this project.

2) Again, with your GOOD FABRIC scissors, cut a rectangle piece of white felt then cut a hole in the center of it.

3) Slide the elf's head through the felt, push the bottom of the white felt through the elves arms and tie the colored strip of felt around the waist. Easy peasy karate gisy. 

4) For the hard part... I just couldn't let it go with the costumes, I HAD to position them to appear to be in a match, so i just slid bamboo skewers through the bottom on their gi and stuck the sharp end of the skewer in an old zucchini to stand them up ( it was about to go bad anyway). I put other fruit around them to hold them up into position and i just manipulated their arms and legs until it looked like one elf was kicking and the other elf was blocking. I did this by sliding Alfy's leg through his arms and moved Belle's arms until she looked like she was blocking. I know some people modify their elves to have bendy arms and legs, however, my elves are not modified.


Check out my blog on my Elf setup last year, but that humor was more for my adult facebook friends and my kids did not see it!!!
Good block Belle!!! Sorry Alfy no point for you!


Grade: A+
Skill Level: Low
Difficulty Level: Low
Frustration Level:Low

Cost: Less than $2

Saturday, November 22, 2014

Mixed Media Camera

It was my friends BLANKITY BLANK birthday this week (At our age we only provide the actual number for legal documents ONLY) and I wanted to make something personal for her. She is a photographer at True Story Photography and took My Christmas pictures last year. I made her a mixed media camera and incorporate her logo on it at the very last second.
I started out with the perfect scrapbook paper with little teal cameras on it, then I chose acrylic paints and other papers that matched. I threw in some red just to make it exciting.

I just threw all the acrylic paint colors on the canvas and just started blending. The biggest problem, I think, is the urge to over blend which makes your canvas muddy instead of having an overall marbling effect.

While still wet, I added some lighter paint to a swirly stamp (swirls are my favorite). After the canvas dried I added a light sponging of strategically placed red just to add dimension and bright color.


Most of scrapbook paper had designs. For the paper without a design, I used my butterfly stamp to create a whimsical effect. It was easy to cut out shapes to create a camera because the shape is pretty basic. 

I went around the edges of some the papers with acrylic paint to provide an outline effect. 

I printed out "... worth a thousand words" on my printer and added my swirl stamps. 

After decoupaging the entire thing , I decided that i should have added a tree and key. Luckily I had a tree stencil and I had bought keys at the craft store. After stenciling on the tree,I decoupaged the entire thing again. The final touch was gluing on the key.

 I hope she likes it !


Grade: A
Skill Level: Minimal
Difficulty Level: Low to Moderate 
Frustration Level: Low

Cost: I have no idea, I had all this stuff at home already


Sunday, October 12, 2014

Teenage Mutant Ninja Turtle costumes

I've really been neglecting this blog lately because I've been so busy with my new adventure (which I will blog about as soon as I get it together). Meanwhile, I thought I'd go back in time to 2002 Halloween where my kids picked the costume: Teenage Mutant Ninja Turtles.  

The thing that made the costumes complete were the turtle shells that were made from metal turkey pans from the dollar store, spray painted green. I put a slit in the pan at the top and bottom and tied through green elastic so that we could wear the pans like backpacks.


The weapons and masks I bought online from the Halloween super-store, except for the nunchuks, which are real, from my daughter's karate class. I also bought the adult t-shirts online but had to make the kid's t-shirts because I couldn't find anything for kids t-shirts. I bought green t-shirts and created the belly of the mutant turtle with yellow and black slick paint. The scraps of fabric around our elbows and belts were made from fabric at Joann Fabric.


Grade: B
Skill Level: Minimal
Difficulty Level: Low to Moderate 
Frustration Level: Low

Cost: $-$$