Sunday, January 26, 2014

Mock Stained Glass using Crayon Shavings


We started out with broken paperless crayons and tried to shave them manually in a sharper. It was taking to long for my impatient kids, so my daughter though she would help the process out by using the electric sharpener. What a mess that was, I had pencil shavings mixed in my crayon shavings and my sharpener got suck on the soft crayons. My next idea was to put the crayons in a plastic bag and pound it gently with a rubber mallet, only I couldn't find it, so I got out the hammer and a pile of rags so the kids wouldn't break my counter top. I only had to scream 'BE GENTLE' a few times, they were pretty good about it.  

I set out all the crayon bits on paper plates and put a piece of wax paper in front of each kid and told them to decorate the paper with the shavings. Why do kids always have to wipe their gritty hands full of crushed crayon on their clothes. I mean REALLY? This is when I realized this should have been an outside project. There were bits of crayon on my kitchen floor, my counter, their clothes, my clothes. UGH!!! What a mess!! 

Before ironing you have to make a crayon wax paper sandwich with 2 pieces of rag. In other words, have your project layered this way rag wax paper crayon bits wax paper rag


I set my iron on cotton and ironed the top of the rag. Good thing I had the rags on there because the crayon squirted out the side of the wax paper even thought the crayon was an inch from the edge.

I am not impressed by this process. It was a huge mess and the product turned out to resemble a muddy looking Rorschach Test. I didn't like the bubbles that got stuck in with the crayon and it didn't look like stained glass at all. I would not recommend this craft at all because of the high mess to outcome ratio.

GRADE: F

Skill Level: Easy 
Difficulty Level: Low to Moderate (for kids)
Frustration Level: High (for mom)

Cost:  <$ (almost free)

Friday, January 17, 2014

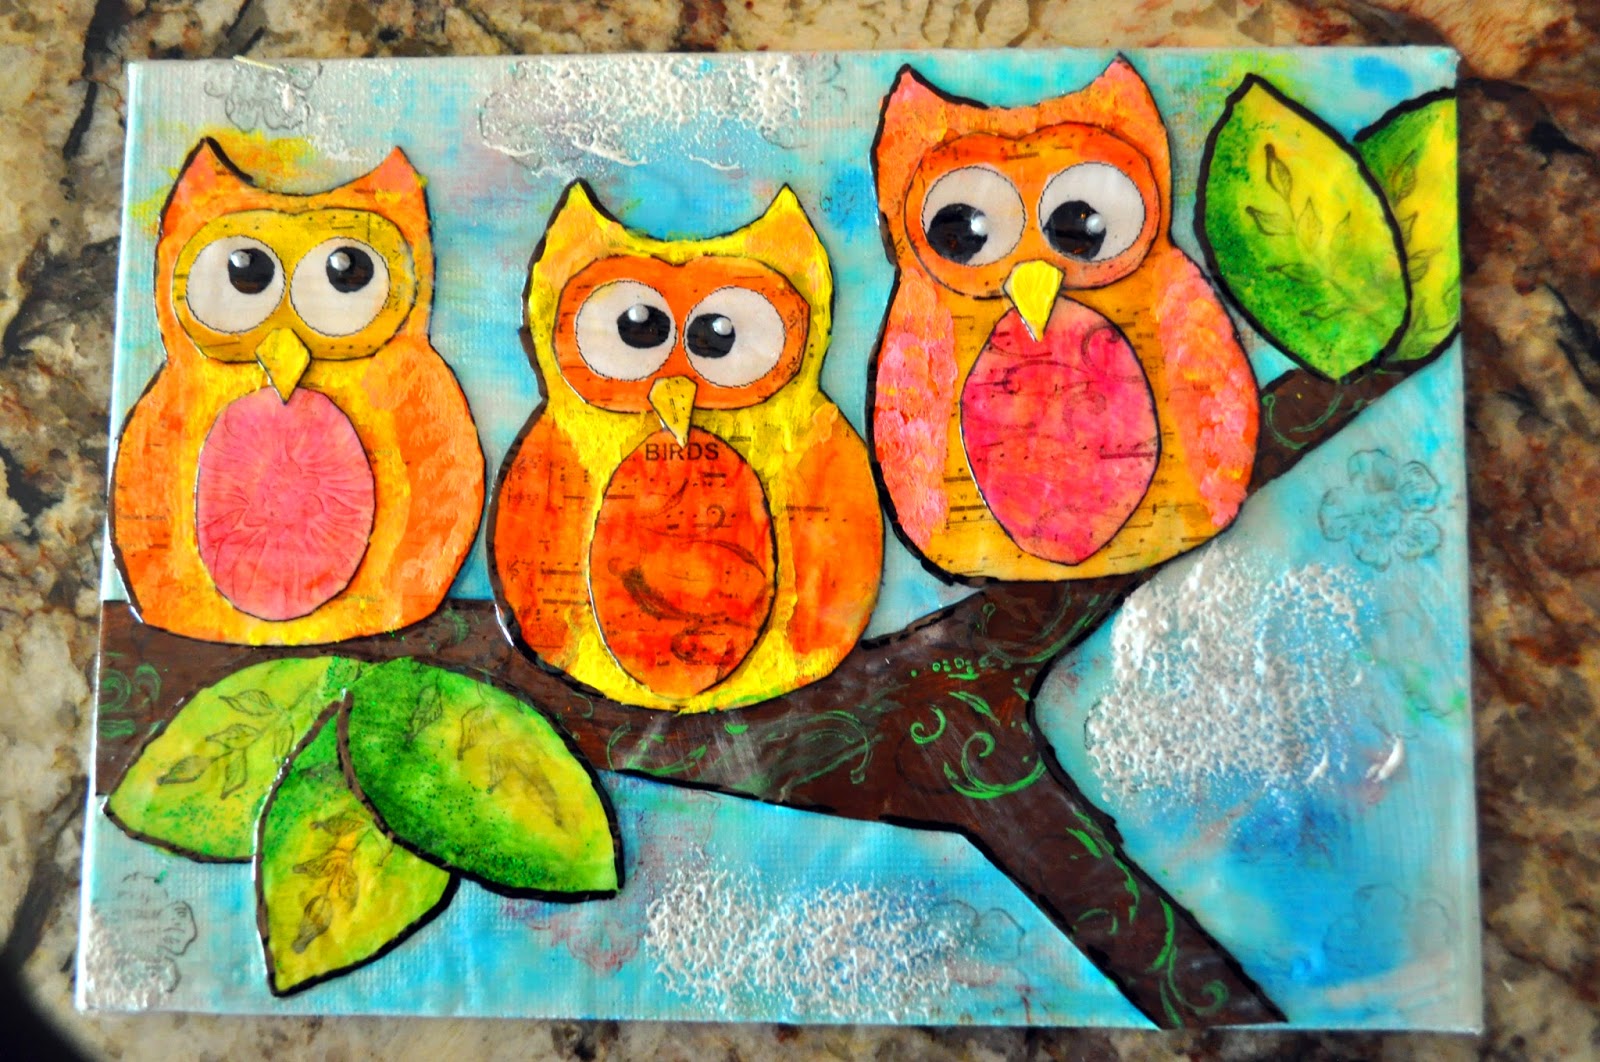
Paper Owls

I never really understood scrap-booking. I only made scrapbooks for my kids because I never filled out all the info in the baby book. Instead of looking like a careless mom, I decided to take apart the books and put it into scrapbook form so I could cut out all the blank pages to hide my inability to track their first year of life. Looking through all the different sticker and notions in the scrapbook isle of the craft store makes me overwhelmed. I don't know how anyone could look through all that stuff, it puts me into sensory overload. 

So I never understood paper crafts, until the other day when I went to go make snowmen. They turned out so great, I wanted to give owls a try and I was hooked. Now I'm paper craft crazy! I like the mixed media art on music and what a perfect way to make three little owls is using sheet music to "Three Little Birds" by Bob Marley.  I attached a printout for you to try too.  

Materials
Cream Card Stock 
Sharpie Marker
Faber Castell Gelatos
Acrylic Paints
Tulip Beads in a Bottle
Modgpodge
Aleene's Clear Gel Tacky Glue 

1) You can print out the printable card stock. The thicker paper is better for gluing and painting, it doesn't curl up as easy. 

2)  I love the Gelatos because they glide like butter and you can blend it with your thumbs on the paper or you can wet a paint brush to get a water color effect, or you can rub them on a stamp for a completely different look. I really don't know how I lived without these little pigment chap-sticks.

3) Use stamps to embellish. I used a snow flake stamp to make the irises, it makes a great texture. 

4) Paint eye whites with white acrylic paint. 

5) Outline with a sharpie. Also use sharpie to color in pupil of eye.

6)Glue together.

7)Feather on acrylic paints to give a feathery look


8)Use "Beads in a Bottle" to give a sparkle to the eye

5)Decoupage it all together. 

I did one set of small owls and a set of large ones. How cute! 

Grade: A
Skill Level: Moderate-High
Difficulty Level: Moderate
Frustration Level: Low
Cost: $0 I used the materials from the snowman project


Saturday, January 4, 2014

DIY Picture Frame

The only thing better than Mixed Media Art Snowmen is mixed media art snowmen in a picture frame. When I was wandering through Joann Fabrics, I stumbled across this bag of 3 dollar scrap wood bag and decided to give frame making a try. 

1) I measured four strips around the picture frame to create one square that fit tightly around the canvas.

2) Cut each strip with a scissors since balsa wood is so easy to cut.

3) Glued the strips together to make a square. This was a bit frustrating because the wood kept sliding so that the edges of the frame were not exactly 90 degrees. A parallelogram with crazy angles does not really make a great picture frame. It took a little time to get it perfectly square. 

4) I cut another 4 pieces of wood to create another square that was slightly smaller than the first. This is so the frame doesn't slide out the front.

5) Then I glued the smaller square on top of the first square and layered the pieces so that the frame would not have a weak point where all the wood met at the same place. 

6) Painted it with FLAT black paint. The flat paint hides a lot of flaws.

7) After the paint dried I taped the picture inside the picture frame with masking tape.

8) I hot glued on cheap strap hangers that I took off some other picture frames. I always get a little thrill when I actually can recycle materials from a previous project.

9) I fished wired gold ribbon through the strap hangers. I use wired because it is much easier to tie a bow that looks stiff and perfect. 

Since these pictures and frames are small and light weight, I was able to hang them directly from the ribbon.

Grade: B+

Skill Level: Low
Difficulty Level: Moderate (its difficult to cut the wood to the correct size, its a good thing the bag comes with plenty of wood strips)
Frustration Level: Moderate (working with glue and wood sliding all over the place is always frustrating)