Thursday, May 9, 2013

Make Thyme for Mom!

As you can see from this blog, we really love giving and getting plants! What better way to share a plant with someone than by personalizing your gift with something you did yourself!  Mother's Day is coming up so I am adding a clever saying on this one to make it memorable!  

 Materials:


  • Terracotta Pots (I used 4 inch)
  • Acrylic Paint in your choice of colors (I used one 2 oz bottle to do 2 coats on 7 of my pots)
  • Paint brush/ paint sponge
  • Black Sharpie Marker or paint pen
  • Water proofing spray for your pot (you can use a Thompson's water sealer or a clear acrylic sealer. If you are going to plant edible plants, then it is important to use a nontoxic sealer.)
  • One penny per pot to cover the hole to keep in the soil but still allow for drainage
  • Soil
  • Thyme plants or seeds
  • Paint Mask


Directions:

Rinse your terracotta pots with water and let completely dry.  This will wash away any clay dust that will get into your paint. I usually let them dry overnight.

Put a white/cream/light colored primer coat on your pot.  This helps the color go on smoother and remain more true to color.  Since this is your primer coat, only one coat is necessary, don't worry about streaks.

Paint your base color.  This will require two coats. Allow your first coat to dry (this happens pretty quickly maybe 10-20 minutes. An exact time is not able to be given due to temperature and humidity conditions as well as the thickness of paint that effect this time, but you will know because the paint is no longer glossy.)

Paint your accents!  Always use two coats with dry time between each coat!  If wanting to write something or add certain details, you can use a Sharpie or paint pen to help make this easier and neater for you!  No need to try to fight with a brush for this step!  This should be fun and not stressful!   You can also use Q-tips or the eraser on the back of a pencil to make your dots or cut sponges to make shapes with your paint.   Get creative!!

When you have allowed your project to dry/cure for 24 hours, it is time to waterproof your pot inside and out.  Follow directions on the label of your product.  Remember if this is a planter for an edible plant, you need a nontoxic water sealer to prevent chemicals from leeching into your soil and then your plants.

Put a penny, rock, piece of broken pot, or other item in the bottom of you pot to cover the hole and help with drainage without soil loss, then fill with soil and plant your seeds or plant!  Now you have a one of a kind gift that everyone will love!


If you want to make the watermelon pot, I used Apple Barrel Light Pink for my base and then painted Folkart Extreme Glitter Neon Pink over it.  I then used Apple Barrel Sage Green with the Folkart Extreme Glitter Peridot.  Then Black Sharpie Marker for the seeds and writing!  Using a Sharpie was a lot easier than trying to paint the seeds and write with a brush and black paint!  One tip to remember though is to make your seeds random and this is a case of less is more!  

The most fun I had with this project was using the Extreme Glitter paint!  I love it!  I see a lot of sparkly things in my garden in the future!  I really loved this product!  Happy painting!

Grade: A

Skill Level: Easy to Moderate
Difficulty Level: Easy to Moderate
Frustration Level: Mild

Sunday, May 5, 2013

Turning Trash Cans Into a Work of Art

If you have animals or enjoy feeding the wild birds then you always have an issue with where to keep the food/grain/seed. If you keep it in your garage or shed, you run the risk of getting bugs and rodents. According to my local feed store.  the best way to do it is to keep it in a galvanized trash can outside. However, that galvanized trash can is ugly (U-G-L-Y ugly, and it ain't got no alibi cuz its ugly) and most importantly, it doesn't go with the decor in my outside living space.  Eventually, I had to give into the ugly can when a brigade of crazy squirrels, high on pesticides, ransacked my garage and ate through the rubber maid container full of chicken feed.

I bought 2 cans of Rustoleum spray paint and some lace doilies from the dollar store. 

1) Painted my can and some other garden metal things blue so they would match.  I waited a few days for everything to dry, 

2) Used painters tape to tape on the lace doilies,

3) Spray painted green over the doilies then removed them,

4) Waited 2 hours to dry, put the seed in the can and placed strategically in my garden along with the other blue painted items.

Grade: A

Skill Level:Easy

Difficulty Level:Easy

Frustration Level: Mild


OOPS!!! Next project: Painting the cement driveway.


Here is a bigger view!! So cute!!


Monday, April 29, 2013

Preventing the Abuse of Couch Cushions with a PVC Tent

Don't you hate it when you walk in a room to see your entire couch dismantled because your kids commandeered your furniture to make a fort? Me too. Furniture is for sitting, not for a tent city re-creation. But kids need a hide-out so I decided to create a PVC tent that could easily be put up and taken down with minimal fuss and less furniture damage.  


Materials (get at home improvement store):
2 - 10 ft. 3/4" PVC pipe 
6 -  3/4" Tee PVC connector
8 - 3/4" 45 Degree elbow spig X slip PVC connector. (one side of the elbow will be smaller than the other because you will slip the smaller side directly into the tee.
Saw


Directions:
Measure and mark one 10-inch PVC pipe for 3 pieces that will be 32 inches and 1 piece that will be 24 inches. The other PVC pipe will be marked for 3 - 24 inch pieces and 4 - 12 inch pieces.

This way you will have
   3 pieces of pipe that are 32 inches, 
   4 pieces that will be 24 inches and, 
   4 pieces that will be 12 inches. 

You only have to saw the PVC pipe half way through and you can bend it the rest of the way with your hands so it will snap and break. Very easy to work with and a bit forgiving, so if your measurements are a little off, you can still work with it.

Next you take your 45 degree elbows and your tee connectors and fit them together as shown in the picture. This will create 2 pieces for the roof of the tent and 4 pieces to connect the sides.

The 4-24 inch PVC pipe will be put into the elbows to make the roof of the tent. The 4-12 inch PVC pieces will be used to make the sides of the tent as shown in the picture. You have now created the front and the back of the tent. 

The 3 - 32 inch PVC pipe pieces will be used to connect the front and back of the tent through the tee connectors.

Give all the connections a good squeeze before you flip it on its side. I found no reason to glue it together, I like being able to take it apart and shove it in the closet when company unexpectedly shows up.

Throw a blanket over it and viola! Tent!

I really have to say that I enjoyed playing with the PVC pipe. They remind me of  giant tinker toys.


I know there is some left overs in the picture, but you won't have that, I'm making other fun things with this stuff in the future !!!


Grade: A 

Skill Level: Medium

Difficulty Level: Medium

Frustration Level: Low

Price: 


Saturday, April 20, 2013

The Brick Wall


I'm pretty much fed up with weeding the edges of my vegetable garden.  You shouldn't mulch or put down chemicals on plants that you plan on eating, which makes vegetable gardens a particular challenge. So when I saw my friend Jeana selling her old EP Henry locking bricks on the internet for only a buck each, I thought this would be a great opportunity to create a wall border for my vegetable garden to reduce the weeds.  I was so lucky that her bricks matched what I had at home.

I convinced my sister that she needed half these bricks for her yard also. So I convinced her to split the workload with me (ha ha ha sucker.) This was a great deal for me since these blocks are usually $1.85 each at a garden center, and it was a great deal for Jeana because my sister and I moved over 300 bricks out of her yard and into our cars. It took about 3 trips filling our 2 trunks with so many bricks, that we drove all the way home on 2 wheels (shhhhhh, don't tell our husbands).

What is really nice about these bricks, is that they have a lip on the bottom so that you can lock the bricks in place so you really don't need to use adhesive if you are doing a wall only 3 bricks high. They also have a nice little place to put your hands to reduce the chance of slamming your finger (true for most people but probably not myself since I am always injuring myself.)

Carrying the bricks is the most difficult part, the rest of the process is pretty easy:

1)Dig out a trench for your bricks about 3 inches deep.

2)Dump sand in the trench. I used sandy soil since my yard is full of it and it is free.

3) Rake the sand to what seems to be level

4)Place the brick in the sand and smack the brick with a rubber mallet. 

5) Check it with a level to make sure it is actually level. I found this free bubble level app for my smart phone, boy is it neat. I'll never loose my level again because this one has a GPS tracker. If brick is not level wiggle it around until it is. Once it is in the right place, put another brick next to it and you can feel with your hand if it is the same height as the last brick you put in. This step is very important so you don't have a crooked wall.

6) For places that will be under the dirt you can use cinder blocks instead of  the pretty bricks.

7) Once you are finished the bottom layer, start piling the rest of bricks on top and push them so they are flat, with the lip hanging over the edge in the back (this is the locking feature that makes it so easy to work with). I would not recommend going past 3 bricks high without some sort of brick adhesive.

Keep in mind I am not a landscaper, I'm a mom who want's an inexpensive brick wall that I can put together quickly. It works, it keeps the weeds out, it looks good and its still standing, that's basically all I need from a brick wall.

Best thing about this project is that it looks great!! The worst thing is that I injured myself (see picture below). I really have to remember to use gloves!!!


Grade: A 

Skill Level: Low

Difficulty Level: Easy

Frustration Level: Low

Injury Level: High

Price: $$ 


I made a brick "sammich" with my thumb. oooouchie. I hope the nail doesn't fall off.

Next time, I'm going to remember to wear my gloves!


Sunday, March 24, 2013

Flower Pot Gifts

We LOVE our teachers!! So yesterday my sister and I went to Jo Ann Fabric and Crafts trying to come up with a clever gift that the kids could help put together quickly. And like most of my brilliant ideas, it actually came from my sister.

My Materials : 
     The terracotta pots, $0.69 each 
     Acrylic paints hidden in my storage area 
     Pinwheels, $1.50 from Jo Ann.
     A bag of individually wrapped mints from the grocery $1.00

I had the kids paint the rims of the terracotta pots, filled the pot with candy, stuck the pinwheel in it and TA DA!! Instant teacher gift. This would also be a good gift for Grandma and Grandpa, but since they read my blog, I will have to come up with something else. 


Grade: B 

Skill Level: Low

Difficulty Level: Easy

Frustration Level: Low

Price: 


Friday, March 15, 2013

Making a Wreath


I have nothing to hang on my front door this time of year.  I decided to attempt to hang a natural wreath on my front door.  I live in the North East and it is cold enough this time of year to keep a natural wreath on your door for about a month until it starts falling apart. 
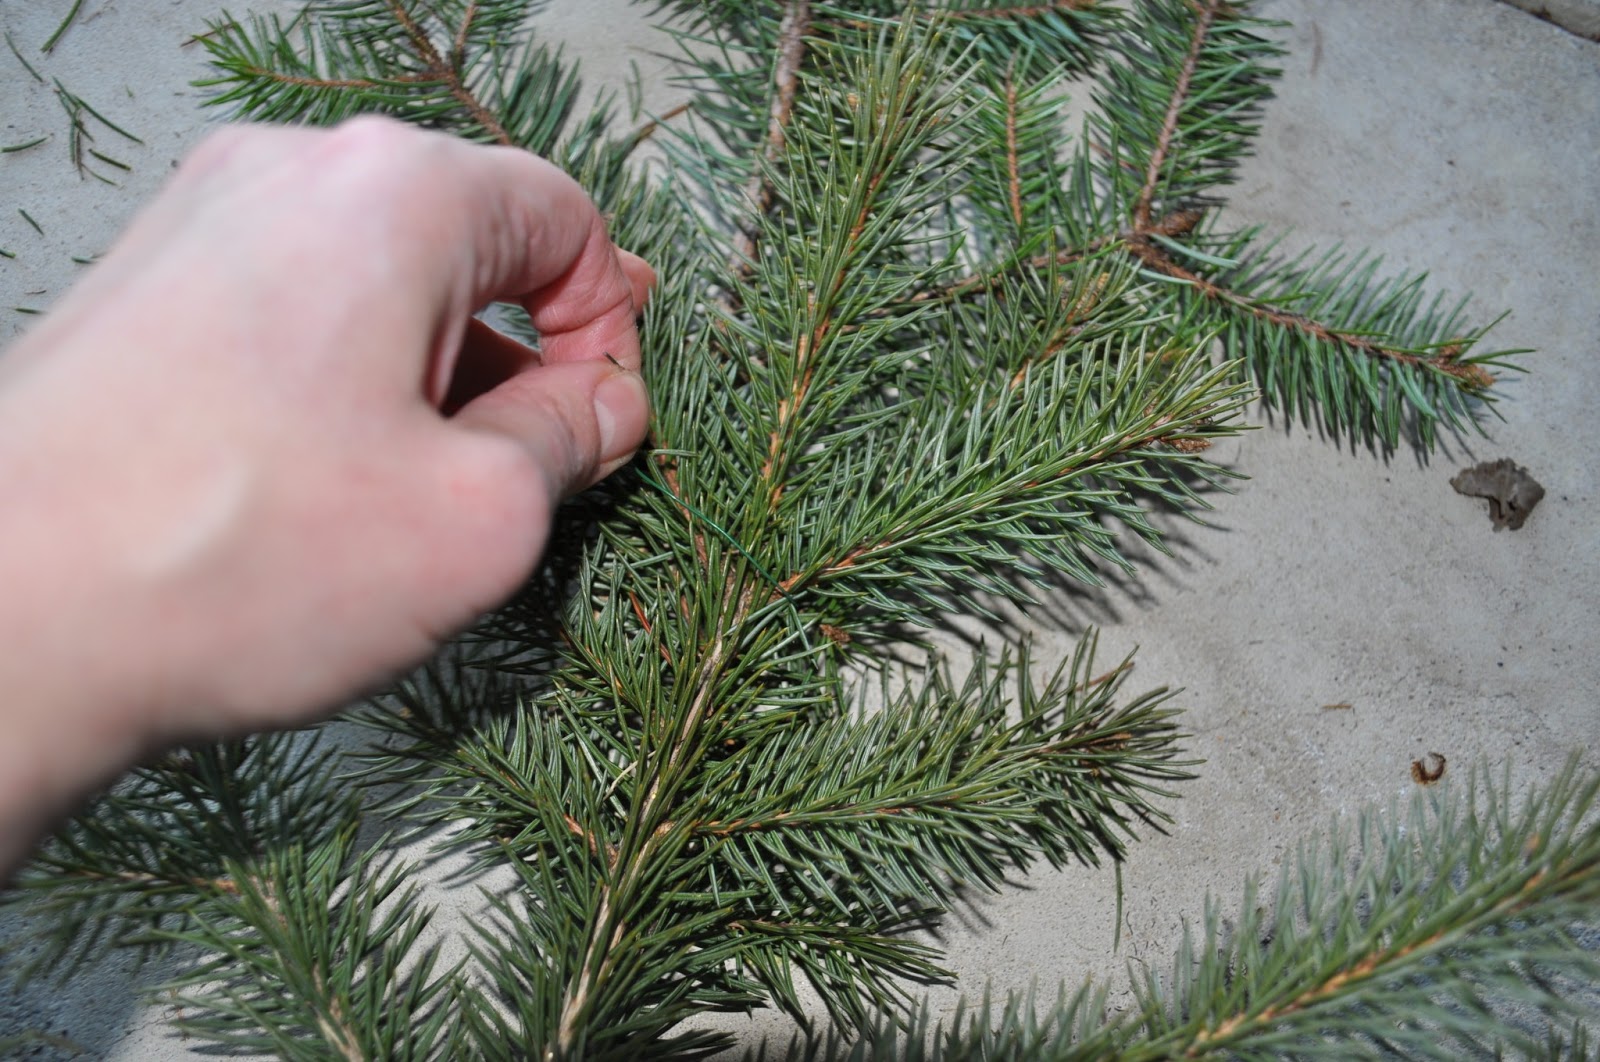
I have this beautiful blue spruce in the back yard so I took some clippings from the bottom of the tree, not the middle or the top. You don't want to make the tree ugly, you still have to look at it.
Materials: Green florist wire, branch clippers, wire cutters and an evergreen tree. The florist wire is around 2 or 3 dollars.
 I cut the florist wire into 12 - 5 inch strips. I used clippers to trim down the branches to be the length  of my elbow to my wrist. Anything left over, I cut off the main branch so I could have fill in pieces. I laid down the main branches and tied them together from tip to end, securing them in two places, on each branch with the florist wire. 


Unfortunately, the darn thing was floppy. Apparently the wired branches will not hold a circle when picked it up. I looked around the garage for something with a circle shape... and found a hula hoop that I made last year from an irrigation hose. I wrapped the florist wire around the hula-hoop and the branches to secure the floppy wreath on the hula-hoop. I shoved in the filler branches in any place that looked thin, put a bow on it and TA DA! 


My daughter was a little annoyed to see her hula-hoop on the front door. Now I realize that I could have used a wire hanger and shaped it into a circle instead of using her hula-hoop. Next time I will give that a try. Another thing I would have done differently is use gloves, I scratched the heck out of my hands and forearms.


Grade: A 

Skill Level: Low

Difficulty Level: Easy

Frustration Level: Low

Price: $ (Florist wire is only around 3 dollars)


Tuesday, March 12, 2013

The Third Grade Science Fair

I can't seem to do anything low key.  Its always got to go well beyond expectations. Is there a disorder in the DSM that describes this behavior? 

This year I was so excited about doing our first science fair in March, I made my daughter choose her topic in January so I could get started thinking about it. She picked The nervous system because of this schoolhouse rock video. 


So I pulled together 5 age-appropriate Neuroscience experiments that an 8 year old could perform and understand from the internet. Thanks for the help University of Washington, what a wonderful website!  My sister-in-law also gave me some ideas because she did a model of the peripheral nervous system with string and cardboard when she was a kid using yarn as the peripheral nerves. I went over all of these ideas with my child and she had some ideas, such as "What if we could make the peripheral nervous system light up?"

CHALLENGE ACCEPTED!!! 

I went through the toy-box to examine everything we have that lit up. I found some toys made with fiber optic lights. BINGO! but they were only a couple of inches and my daughter wanted it to be about 3 feet high so I searched the internet and found a website that sold fiber-optic side-glow cable by the foot.  The great thing about fiber fiber-optic side-glow cable is that you just shine a light on it and it glows.

PROBLEM: The bad thing is that for you to see the cable glow, it has to be about two times brighter than the room.


SOLUTION: I went to the UPS store and bought a box 3 feet high and spray painted the inside black. My daughter wanted to also spray it with black glitter spray for that extra pizzazz.

My daughter drew an outline of a kid body inside the black glitter box with white chalk, punched a hole in the top of the box where the brain would go and pushed in the fiber-optic side-glow cable and slid it into place.

PROBLEM: When we went to tape in the fiber-optic side-glow cable on the painted glitter box it would not stick. DUH. I have worked with enough glitter stuff enough to know that scotch tape will not stick to a glittered surface.

SOLUTION: I used wires to put everything in place. At this point she could not help and now it was more my project than it was hers. Who knew that was going to happen? Everyone probably.

It was very difficult to punch that wire though the box. I had to use a pin to start it then fish the wire through. It took forever and that pinchy wire hurt my hands.

PROBLEM:  We had to make a brain out of clay and some how attach it on top of the fiber-optic cable entering the box.

SOLUTION: I cut a spongy ball in half and molded the clay around it. Then rolled some clay into a long skinny worm and put that all around. I pushed that awful wire though the spongy half ball, I pushed the wire through the cardboard box and Viola! Brains! I put our lizard light on top of  the box where the the cable  was and it looked great. Of course I used energy efficient light bulbs because they are low heat and I didn't want to light the box on fire or melt the fiber-optic cable.

My daughter has these really great light up multi color blinking shoelaces. We decided to wrap them around the spine to make the central nervous system a little more special.

PROBLEM: My daughter didn't like the fact that our peripheral nerve model was white. She wanted colorful nerves.

SOLUTION: I put plastic Easter egg halfs (pink, yellow, orange, purple) on top of the fiber-optic cable and wow!!! It really gave it that extra kick.

This was probably enough for the science fair, but of course, I still wanted her to perform the 5 experiments on the kids to explain how the nervous system works. We studied the the different functions of the nervous system. I typed out the terms that were the most important and I had her define them in her own words, incomplete sentences and all.

Experiments.

#1 Visual Illusions.

This shows how you can trick your central nervous system.   Read the half covered words at the top of my poster. What do they say? Lift the paper and see what it really says. Our eyes see the half letters then sends a message is sent to our brains then the brain fills in the part you do not see.

#2 Two points of Discrimination Test

This shows how sensitive your nerves are on different parts of your body.  Take 2 toothpicks and put them close together on the tip of your finger, does it feel like there are 2 or one toothpicks? Move them farther apart, does it feel like two or one toothpicks? Repeat on your elbow.  Can you tell the difference between one or two toothpicks on your elbow? 

#3 Autonomic vs. Somatic Blink Experiment

This shows how you can control blinking (somatic) and how you blink automatically (autonomic).  Control the movement of your eyes by blinking.   Have a friend clap their hands in front of your face and you will automatically blink without even thinking about it.

#4: Digestion Response

This shows how the parasympathetic nervous system works. When you are at rest, your body digests your food. Smell the mystery box. Does that make your mouth water?  Saliva is part of digestion and the smell of oranges causes your parasympathetic system to respond by making more saliva. Smell the other mystery box, does this give you the same reaction?

#5: Flight or Fight Response and Heart Rate
(FOR 3rd graders and up) This shows how our sympathetic nervous system reacts.  Watch the movie; does your heart rate go up? If it does, I caused you to have a sympathetic response.


The number 5 experiment was a big hit with the classmates. I thought I was going to get in big trouble but most of the kids were familiar with this youtube video already.

Now if there was a prize for this Science Fair, we would have won. But it was only for participation. That doesn't matter, I enjoyed every second and I can't wait until next year's science fair.